UiPath Orchestrator is powerful yet complex tool. It changes very often and it is for me one of the least favorite UiPath tool, from user experience perspective. The way to achieve one thing is different every quarter of year. Now (it is January 2022) I have the feeling that most of the bugs had been solved and that Orchestrator is mature. I bring you this tutorial on how to setup Unattended bot and I will try to explain some details around Licensing, Machine templates and allocation and I will touch also other topics.
For those of you that are already familiar with Orchestrator and you just want a straightforward how to I prepared a one-page Cheet Sheet. You can Download cheat sheet here (108.4 KB)
How to setup Unattended Robot on a Virtual Machine (UiPath)
Automation Cloud
- Go to Admin → Licenses → Robots & Services
- On the bottom of this page, check (edit) License Allocation to Tenants (you can check if they are in use in Orchestrator)
Orchestrator (at desired Tenant)
- Go to Tenant → Machines → +Add Machine → +Machine Template
- Give new machine template a name and allocate at least 1 license (Production Unattended)
- After creation, Copy the Machine Key
On the machine (where Unattended Robot will run)
- Download UiPathStudio.Msi* from Automation Cloud homepage.
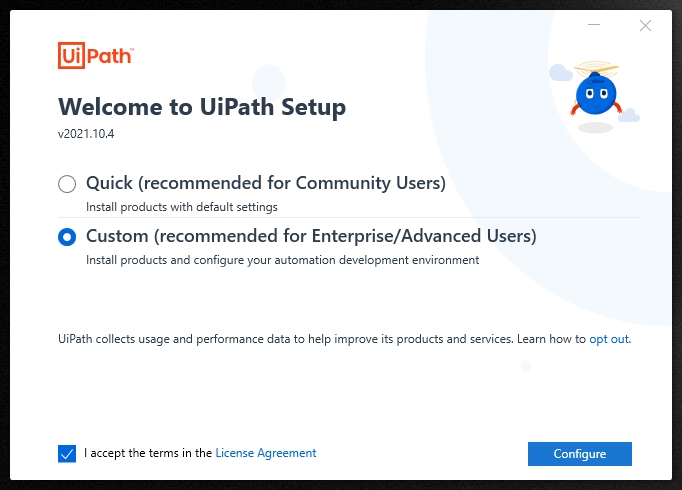
- Run the installer and choose Custom.
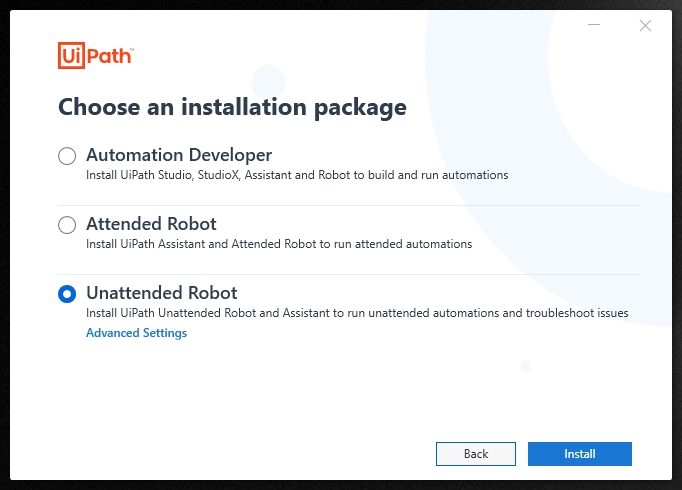
- At next screen choose Unattended robot.
- After installation is complete, open UiPath Assistant.
- Go to Settings → Orchestrator and enter Orchestrator URL and Machine Key, click Connect.
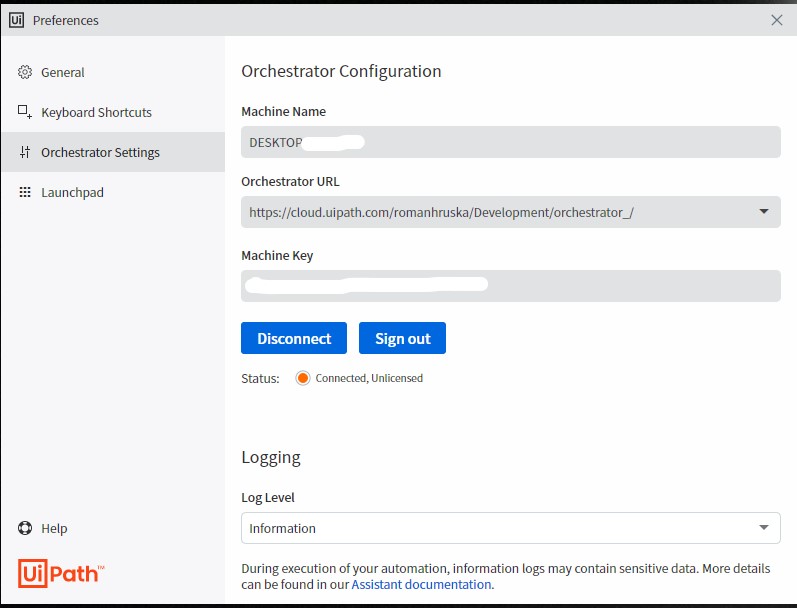
- Now your status should be: Connected, Unlicensed, that is okay.
- Reboot the machine
Automation Cloud
- Go to Admin → Accounts & Groups → Robot Accounts → Create new
- Give your new Robot User some name and save.
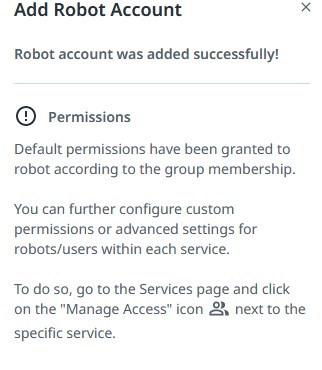
Next screens will inform you that you have to Manage Access for newly created account.
You can do it from Tenant → Services OR go to Orchestrator…
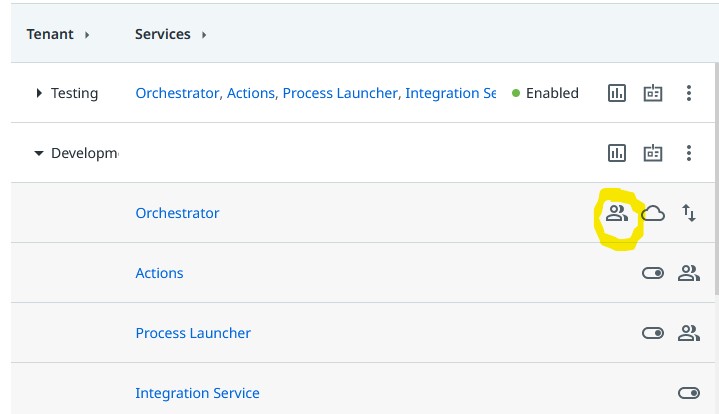
Orchestrator (at desired Tenant)
-
Go to Tenant → Manage Access → Assign roles
-
Click +Assign roles → Robot Account
-
In next screen search for the Robot User you created.
-
Add role: Robot
-
In next screen add Credentials that will be used to login to machine
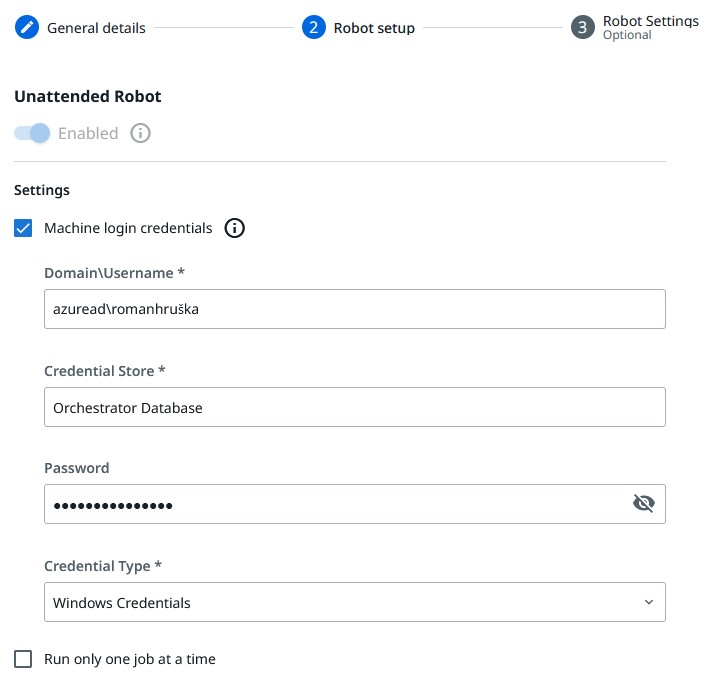
-
Optionaly, setup Robot Settings, Confirm.
-
Go to Tenant → Folders → Manage Folders
-
For folder you want, click Assign Account/Group
-
Search for your Robot User, set roles: Robot
-
Back in the Folder settings: At Machines tab, click Manage Machines in Folder and add the machine template you created.
Troubleshooting:
Could not start executor. The requested resource is in use.
Could not start executor. A specified logon session does not exist. It may already have been terminated.
Possible Solutions: Check RDP Connections; Reboot the machine; Log Off the machine; Seach the Forum 
Troubleshooting: In the machine, you should see this service running:
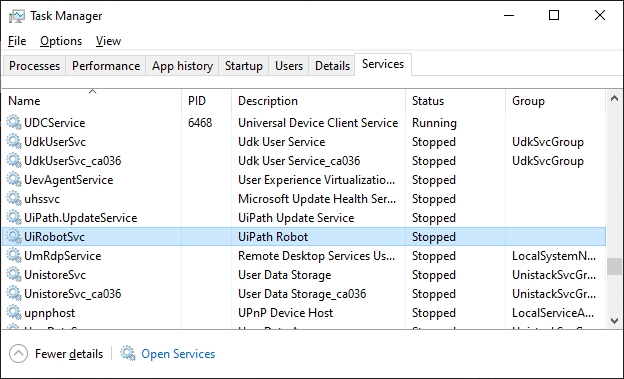
This means your robot service is running unattended and all is as should be 


