Dear community members, I would like to show you an interesting approach to automation your web applications using a headless browser, or in other words, using a webdriver.
For this article, I prepared a demonstrational example: HeadlessChromeWebDriver.zip
Introduction
Headless browsers provide automated control of a web page in an environment similar to popular web browsers, but they are executed via a command-line interface or using network communication.
The WebDriver is a protocol used to automate browsers via REST API calls in a separate executable than the browser itself. This protocol is widely used for automated testing of web applications. Nonetheless, the WebDriver protocol is not strictly meant for headless browser automation, and can also be used to operate browsers visually.
So, this technology allows us to automate browser interaction without having any browser window open. All the automation runs in the background. This can be beneficial in some scenarios.
Awesome! Right? Well, let’s dig deeper to find out, that:
- it can be used only in Open Browser activity scope.
- activities such as Click, Type Into, e.g. must be configured to use the SimulateClick, SimulateType, or SimulateHover properties or the Send Window Messages property
- Events Monitoring and Image Automation does not work in HeadLess mode.
- more about limitations, read here: Known Issues and Limitations
Setup
1. Download webdriver
The Webdriver itself is an executable. Download Webdriver of the desired browser. In our example, we will work with Chrome.
Download the driver
Chrome - ChromeDriver - WebDriver for Chrome
Edge - Microsoft Edge WebDriver - Microsoft Edge Developer
Firefox - Releases · mozilla/geckodriver · GitHub
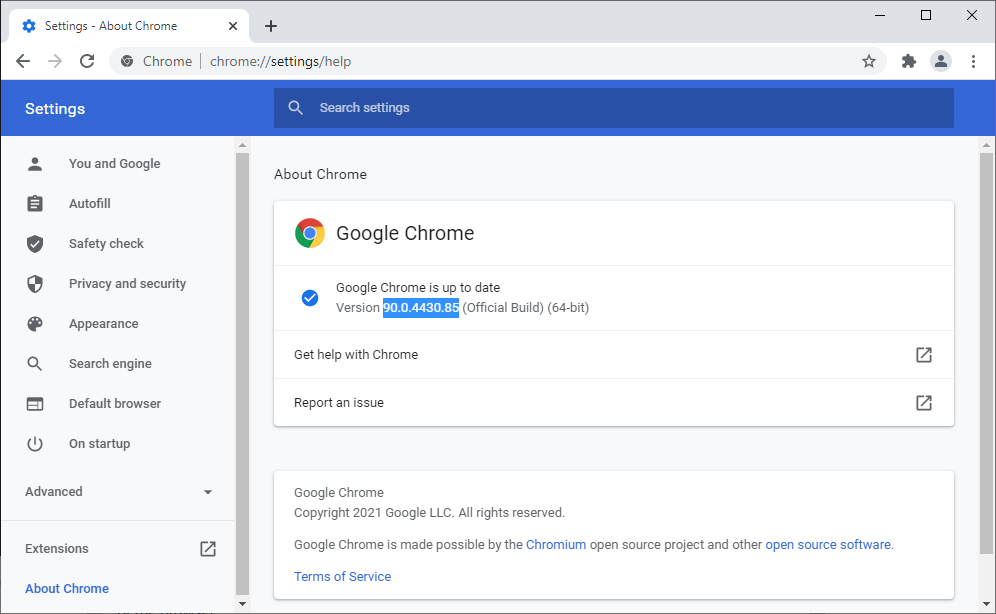
 Important: the version of webdriver must match the version of the browser. To check it in Chrome go to Settings → About Chrome.

If your Chrome is up to date, then you should be fine with downloading the latest version of Chrome Webdriver

Unpack the archive and save ChromeDriver.exe to any location.
For example to C:\webdrivers\
2. Edit system variables
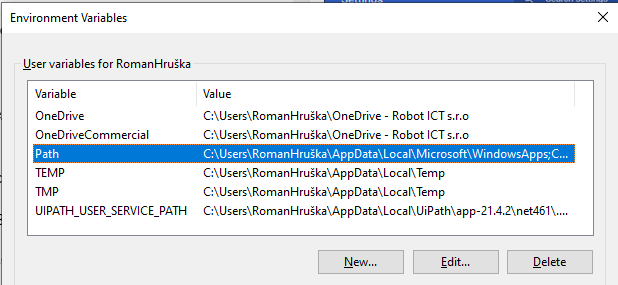
In Start, look for Edit environment variables for your account. Open it.

Select Path in User variables and click Edit…

In a new window, click New and enter the path to Webdriver location (in our case: C:\webdrivers)

3. Ready!
Restart your Robot Service and Studio and you should be good to go!

If UiPath says it cannot find the Webdriver, I recommend checking all the steps once again and restarting your PC too.
How to use it?
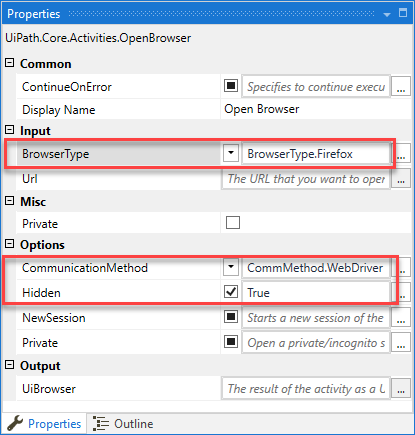
You have to setup the Open Browser activity like this:
- BrowserType: Chrome (or your desired browser)
- CommunicationMethod: WebDriver (or Native for testing, and for visual webdriver use)
- Hidden: True (False for visual webdriver use)

Example
I prepared an example demonstration workflow. Small project that use a simple website with a calculator.
This example includes two files:
- Chrome.xaml - demo in Native, standard way
- ChromeWebdriver.xaml - workflow adjusted for Webdriver use
 HeadlessChromeWebDriver.zip (88.3 KB)
Summary
Pros:
- operates fully in background
- works with most major browsers
- use same selectors as standard/native way
Cons:
- need od extra setup on each robot machine
- dependent on executable file that must be updated every time the browser updates


