
This is third part of my little series about Modern Design Activities, following the previous one: [UiPath] Modern Design Experience – Part 2: Click and here I want to do a little tutorial on how to work with Modern Design activity Type Into.

Type Into is another activity from group “UI Automation” that can be used only within Use Application/Browser Scope. In comparison, activity of same name from “Classic experience” can reside without such parent scope.
With your Use Application/Browser scope ready, let’s drag&drop the activity inside. It will look like this:
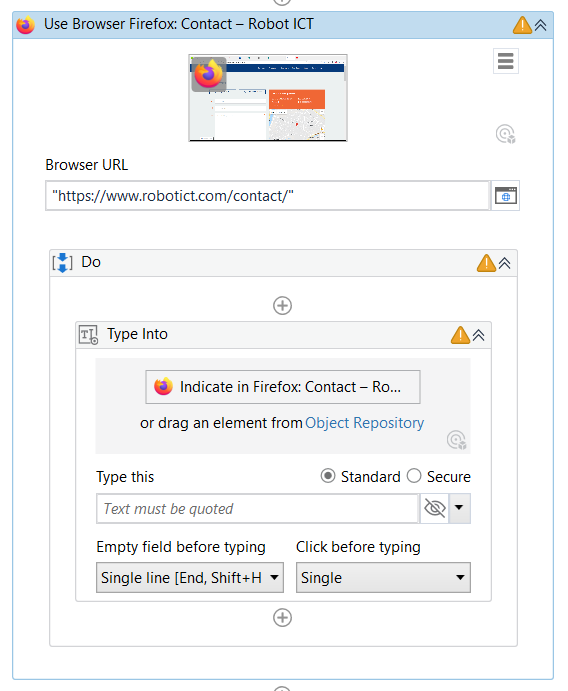
As you can see I used our company website inside Firefox browser. Nice fit, both have blue and orange colours. 
 Back to the topic…
On the page https://www.robotict.com/contact/ there is a form with some input fields. Here I will demonstrate how to use Type Into activity
Click the button that says Indicate in Firefox: Contact… (depending on your browser and page you are automating)
This will bring you to “Target indication”. I described all the possible things that can be done there in the previous article: [UiPath] Modern Design Experience – Part 2: Click
So let’s skip that for now and focus on the selector. Here is my quick tip:
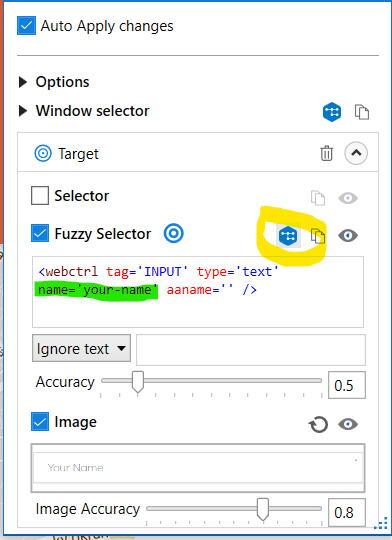
I did not like the original selector (the last and only editable node here):
<webctrl tag='INPUT' type='text' aaname='' />
Why? Because there is nothing specific to the target. This selector will take any first input field that will be found on the website and type into it. That is not a good way! Make sure to always check your selectors.
So I clicked the UiExplorer icon (marked yellow) and played with the selector in a way that in the end the attribut name is used to target the field. Much better!
<webctrl tag='INPUT' type='text' name='your-name' aaname='' />
Properties
We should have a look at the properties. There are many of them so let’s go top down one by one.
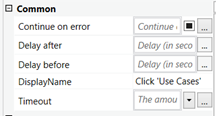
A section called Common is not bringing many upgrades. Only Timeout is now in seconds. Rest of the properties are self-explanatory.
Input:
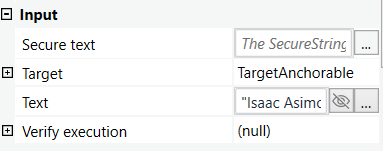
There are two input possibilities. You can either use a String variable and fill in property Text or a SecureString variable, then you put the variable in the Secure text property. Only one is allowed at once. For the Text property, you can turn visually the text into asterisks, if it is something sensitive as a password. Fine for testing but don’t you dare hard-code you passwords in production automation! 
Target + Input/Output Element:
All of these properties are technically the same as in the Click activity, so to know more about it, please follow my 2nd part of this series here: [UiPath] Modern Design Experience – Part 2: Click
Let’s check out the Options part:

Here I would like to show you something new and that is this little icon that you maybe totally missed. If you click it (after indicating the element), it will try to automatically detect the most suitable Input mode. How cool is that?  Huh?
Huh?
The rest of the Options section is divided into groups based on for what Input modes they apply:
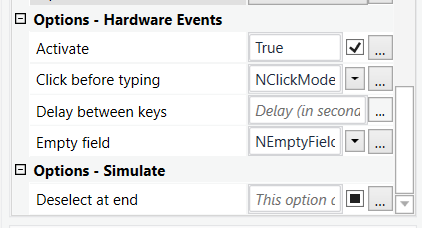
For those who see this for the first time:
Activate helps to bring the element to the foreground before typing the text.
Click before typing can help you with some fields that needs that click before typing.
Delay between keys (in seconds) - you can adjust how “fast” will your robot type the text. It is great for slowing it down in case typing in the field is dynamically showing a drop-down and if the robot is too fast, it is not working as expected.
Empty Field has two options: Based on if you have single line field or multi-line, the robot will actually perform few keyboard shortcuts to select all the text and delete it. 
Deselect at end - documentation says that this helps to send a Complete event in order to trigger certain UI responses in a web browser.
What is next?
- [UiPath] Modern Design Experience – part 4: Check App State
- You can use Object Repository with Modern Design experience - RPA Fridays #10 - UiPath Object Repository
- See the first part: [UiPath] Modern Design Experience – Part 1: Introduction + Use App/Browser


