
This article is following previous parts (1-3):
[UiPath] Modern Design Experience – Part 1: Introduction + Use App/Browser
[UiPath] Modern Design Experience – Part 2: Click
[UiPath] Modern Design Experience – part 3: Type Into
[UiPath] Modern Design Experience – part 4: Check App State
This will be final part from the Modern Experience activities series. This time we will learn about Data Extraction by which I mean all that is happening from the moment you click on icon Table Extraction (in classic it was called Data Scraping).
The wizard, user interface, functions and usability had been significantly improved. Let’s see what is in there.
Table data extraction / table scraping
The first functionality to try out is to extract data from a table. To demonstrate the functionality I will use this testing website: https://acme-test.uipath.com/ (you have to create an account - the email address can be non-real).
In UiPath Studio, click the Table Extraction button (in top menu).
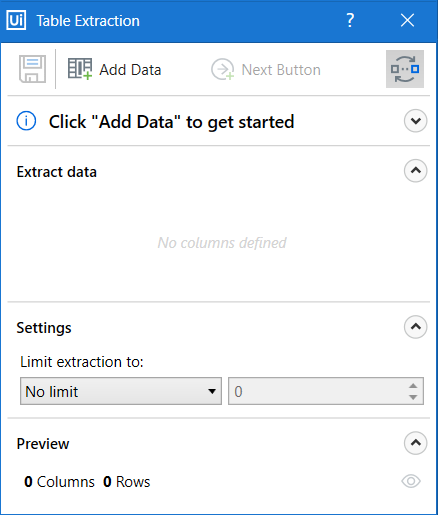
The “Table Extraction” window will popup and Studio will minimize itself.
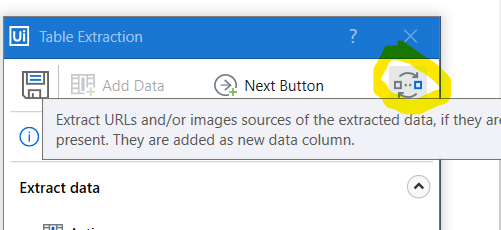
Before starting the extraction, let’s not miss the little icon in top right corner. By clicking it you can toggle on/off the option to extract URLs from and/or image sources from the data. Extracting URLs can be very useful especially if you wish to later use those URLs to go page-by-page through some search results or similar data.
Get the table you want to extract ready in the background and then click Add Data.
Once you click anywhere in the table (I am using the “Work Items” table), you will get this popup:
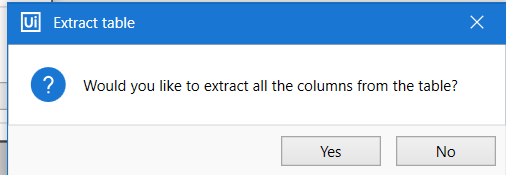
That means that a table has been found and it is possible to scrape it completely, if you wish. Beware that not everything that looks like a table in fact is a table, since this is defined by how the website has been build (what is the source code) and not by how it looks like. And vice-versa. Some things can look like a list but will be a table. This part is about being surprised from the target you want to scrape.
You can choose No, if you wish to extract data from repeating patterns that are not following the structure of the table, but in most cases you would be happy from this popup and click Yes! 
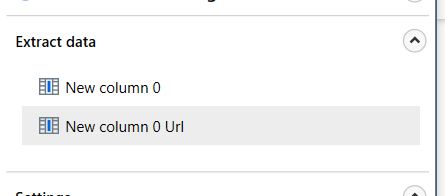
All columns will be identified and if their names are also detected, you will get something as pretty as this:
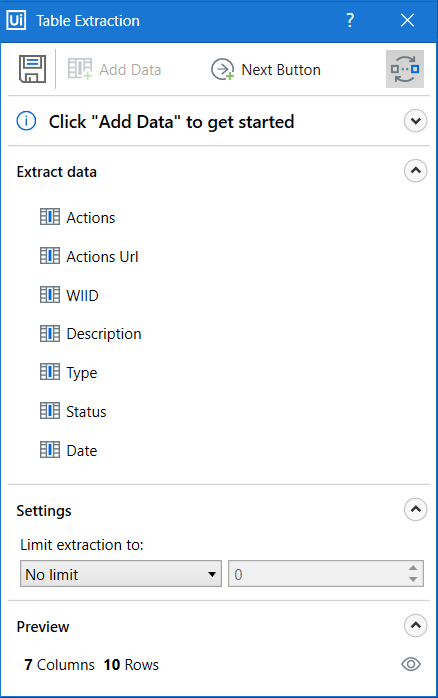
These are the extracted columns. Result of this extraction will be a DataTable and in this screen we can adjust which columns from the original table will be stored there and which not. Also notice, that if a hyperlink is present in the table, it will be extracted in separate column (Actions Url).
It really works nicely and now you can adjust the resulting DataTable structure.
Columns settings
Click on each column name under the Extract data part and click the gear icon. There are few other things you can see and setup per each column:
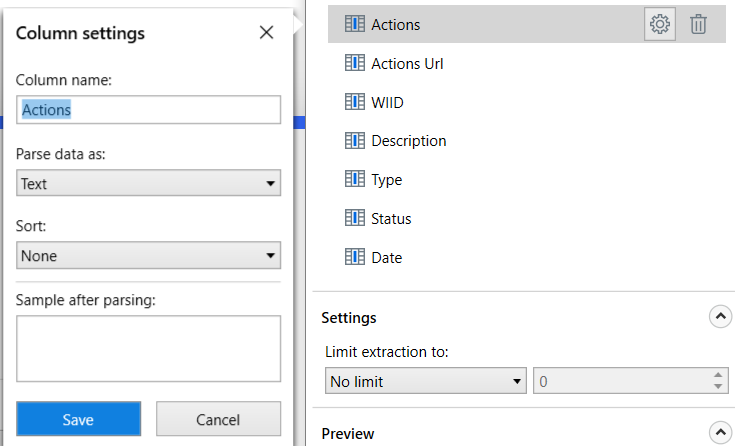
- Column Name - the name of your column that you can call it later. If names of columns were not detected, your columns will be called such as “Column1”, “Column2” etc., so here you can give your columns proper names.
-
Parse data as - choose the desired data type (Text, Number, Date & Time) to already apply some pre-formating.
- The Number and Date & Time options will bring one or two more fields to setup the format of a number or a date. Play a bit with the setup to fine-tune your extraction format.
- Sort - allows you to sort the results by selected column. It works in kinda funny way when you do the setup for more than one column, but if you do the setup only for one, you will get nice results.
You need to click the Save button every time you do some changes in column settings.
Every time you do any change in the columns, you can always click the little preview-eye icon in bottom-right corner. This will display a preview of the data (scrape of first page) with settings you applied.
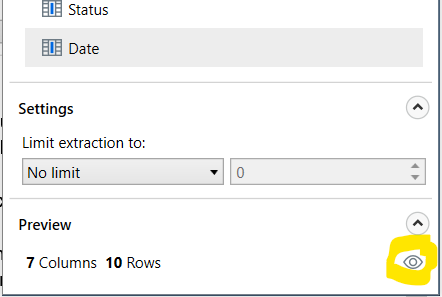
Between the preview button and the columns there is a small Settings section that allows you to limit your extraction based on Max rows or Max pages (in case your data spans multiple pages).
Multiple pages
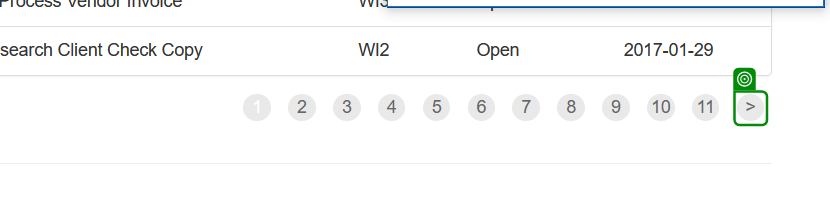
If you wish to scrape data from a source that spans multiple pages, click the Next Button.
![]()
Then indicate the button that works in your data source as the next button, for example this:
You will see that after you indicate the button, it will pop in your Extract data part like this:
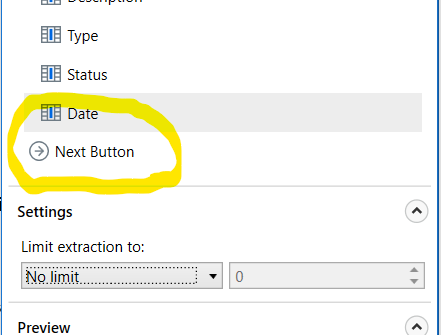
If you click that and hit the gear button:

The selector editor will pop up and you can adjust the next button selector. I recommend to always check the next button selector, so you are aware it does not contain any unwanted things and it is a stable and bulletproof selector, since - Studio does not always build the selectors in the most clever way.
Good, let’s save that and see what else we can do…
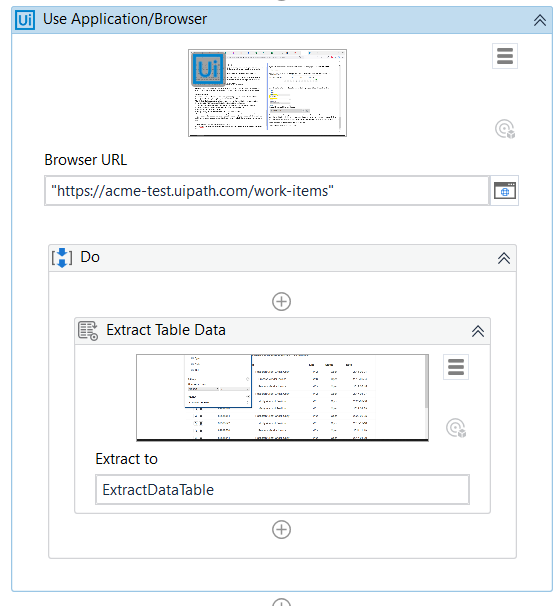
Hit the floopy drive icon ![]() . Studio will automatically create a Use Application/Browser scope in case you don’t have it yet. Your workflow will look like this:
. Studio will automatically create a Use Application/Browser scope in case you don’t have it yet. Your workflow will look like this:
If you initiate the Table Extraction whilst already having a scope, only the Extract Table Data activity will be added. 
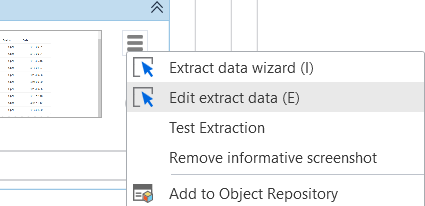
One of the most significant upgrades to the table extraction (and data extraction in general) is that with Modern Activities you are able to edit the extraction setup. With Classic activities you would have to go through the extraction wizard again - start from scratch. But with Modern activity Extract Table Data, you can just simply hit the hamburger menu and select Edit extract data. Of course - the data you were working with (the website or the application) must be present/accessible!
By the way - the first option - Extract data wizard will initiate the extraction wizard from scratch and overwrite your previous one. It is similar behavior like when you have UI activities and you select Indicate Target On Screen. It even has the same shortcut.
Another new feature is the option called Test Extraction. Try it yourself! This button will display first set (first page) of data as it will be extracted during the process run. Isn’t it so cool? 

Before we will dive into where do our data go to and what interesting properties the Extract Table Data activity has, let’s explore how does this works if we don’t have tabular data, but still structured data, such as a search result.
Data extraction from non-tabular data (lists, search results, …)
As an example, I will use ebay.com and search results on something quite specific, like virtual reality glasses. It doesn’t really matter for the example. Let’s say I wish to extract name of the product, price for the product and url to the product, which, as you will see, can be done super easily.
Note aka disclaimer: eBay is fortunately a nice example where in general selectors and UI interaction is working nicely since there is no strong anti-bot protection. If you try to use this technique on other popular websites, your chances to success can be much smaller. And as a last note: The terms & conditions of all of these website prohibit robotic/automatic scraping of the data. I am using eBay just to demonstrate how the extraction works, for educational purposes. Use data scraping only in systems where you know it is not prohibited.
In an empty workflow (.xaml file), I will push the Table Extraction button.
Studio will minimize and a Table Extraction window will float on top of all. Navigate to the website/application you wish to extract data from. In my case - search results from eBay.
Click Add Data and select first occurrence of the first type of data you wish to extract. In my case - first product title in results. All similar data (all the other product titles) will be marked in light blue.
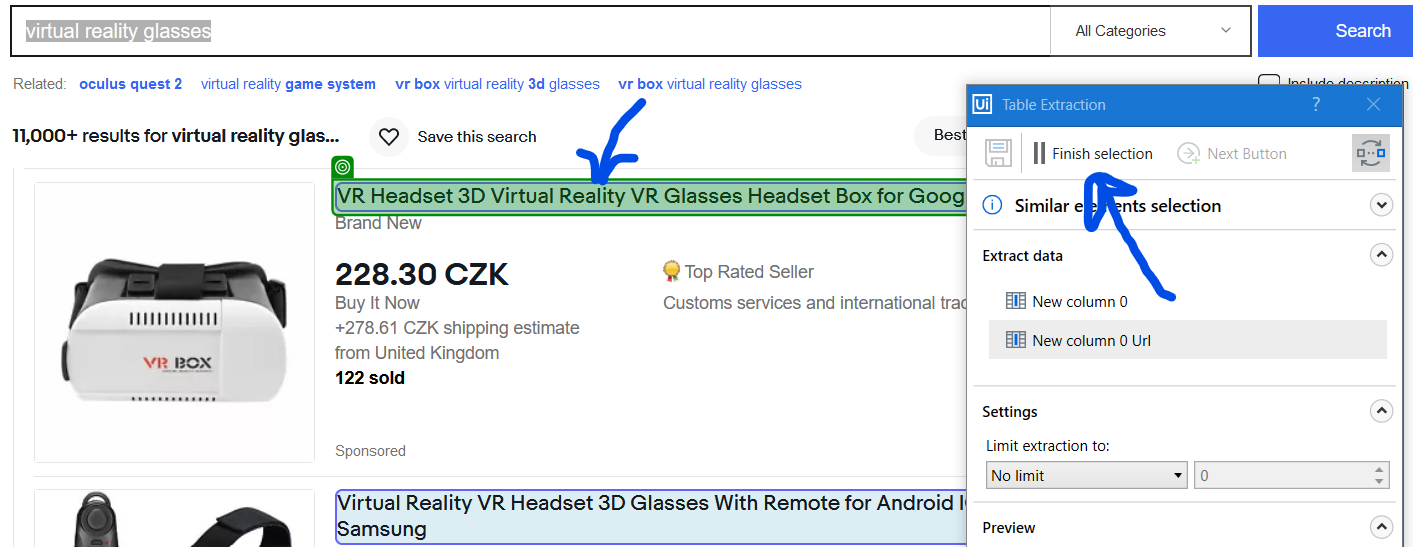
If you are happy with the results, click the Finish selection button. If the results are not ideal (some data is missing, some titles are not indicated), continue clicking those elements that have been missed - this is called similar elements selection. Usually after few corrections all same-kind of data are highlighted correctly. On the background - Studio is fine-tuning ultimate selector that applies for all the elements - so it is looking for similarities.
The title of product is a hyperlink at the same time, so the extraction wizard created two columns from this step:
As shown in the first part, you can use the gear icon next to each column to adjust its properties like name, data type etc. You can delete columns that you don’t need.
Nice, so we have product title, product URL and now we need to extract product price.
Again - click Add Data and indicate first occurence of it.
This time, one extra click on the second price in the results list is needed, because not all element were detected. You can also see it in the list of columns by the new column having red color:
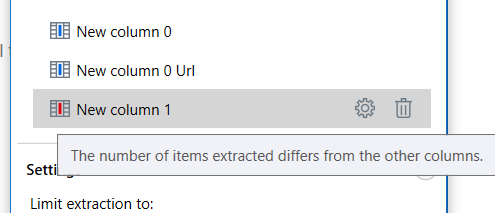
So clicking the elements that were not indicated should solve the problem.
You can continue like this to add as many related structured data that you wish. Again, you are able to indicate Next Button and also to use Limit extraction to: settings to adjust the results. In case you skipped the previous part of this article and are reading from here, you can read more about these things above. 
Save (floppy disc icon) will save it and that’s it.
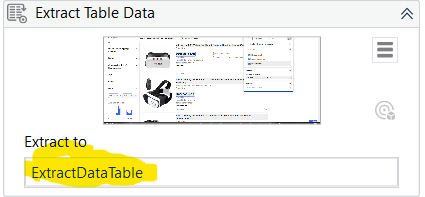
Where are the scraped data stored?
After you go through the Table Extraction wizard, hit the Save button, new activity/activities will be created along with new variable of type DataTable. Default name is ExtractDataTable.
You will see this variable in your Variables pane and it is a good practice to give it more descriptive name such as WorkItems or EbayResults. Got me?
Most probably you want to loop through the extracted results and do something with each row - then you should go ahead and use For Each Row In Data Table activity  For now - search for other resources on how to use it and explore the DataTable activities. If once I will publish article about it - you will find it here. But in many of the RPA Fridays videos I am working with DataTables, so make sure you watch them
https://www.youtube.com/playlist?list=PL0I7SqJ28E1ICqQ5UOYGijiW-qkwAcpVO
I hope you found this article useful! Happy automation!


